
Pinnacles of Adventure Photosphere
Pinnacles Desert, Western Australia
Good day. Over the past few months, I've been driving around to some iconic locations along the West Australian coast at night to capture 360 degree photospheres, showing the beauty of dark skies above the Australian landscape.
I've found that photospheres are an effective way to enable the viewer to experience what it is like to be there for themselves. Coupled up with a VR headset, photospheres are truly an immersive way of experiencing Astrophotography.
In this post, I'll be writing on how I prepare, stitch and project my 360 photospheres. The image that we will be working on consists of 80 individual images shot in a 10 x 8 grid in landscape orientation with each image being overlapped by 50%.
The most important thing to remember in photospheres is to shoot a full 360 degree by 180 degree to ensure a 2 x 1 aspect ratio for the final image.
It was shot using a Nikon D750 DSLR, Sigma 24mm ART lens and a Gigapan Epic Pro panorama mount. Total shooting time was around 40 minutes.
Settings:
ISO 3200
F1.8
25 seconds x 80 frames
Here's the layout of how the images were shot.
Preparing the RAW files
Before we stitch and project our images, we need to prepare the RAW files by correcting the White Balance, Lens Distortion, Lens Coma, Lens Vignetting and add some Noise Reduction. These steps will help us a lot in the stitching process by removing any image artifacts which puts less stress on the stitching software.
First import all the images to Lightroom and click on the "Develop" module to process the images.

Once in we're in the Develop Module, we can start with the Lens corrections. I tend to work on a single image that contains the Milky Way core to get an accurate White Balance. We generally want the core to be pale yellow in colour.

Let's remove the vignetting and lens distortion by enabling the Profile Corrections. Ensure that the "Remove Chromatic Aberrations" box is checked as well.

Now that we have a flat and evenly exposed image, we will go ahead with the White Balancing. The way we do this is to slide the "Vibrance" and "Saturation" sliders to +100 to have a look at what colours data was captured in the image.

As you can see, we have far too much blue and magenta in the SOOC shot. We generally want the core of the Milky Way to be pale yellow and the rest of the sky to be a good mixture of green and magenta.
Slide the Temp and Tint sliders until we achieve the desired White Balance.

Once we are satisfied with the White Balance, we can reset the Vibrance and Saturation sliders back to 0.

The next thing we need to do is a minor technical clean up by removing the default sharpening that Lightroom applies to all images and add some minor noise reduction.

Our image is now ready to by stitched, we just need to sync the settings to the rest of the images and export them in the correct format.

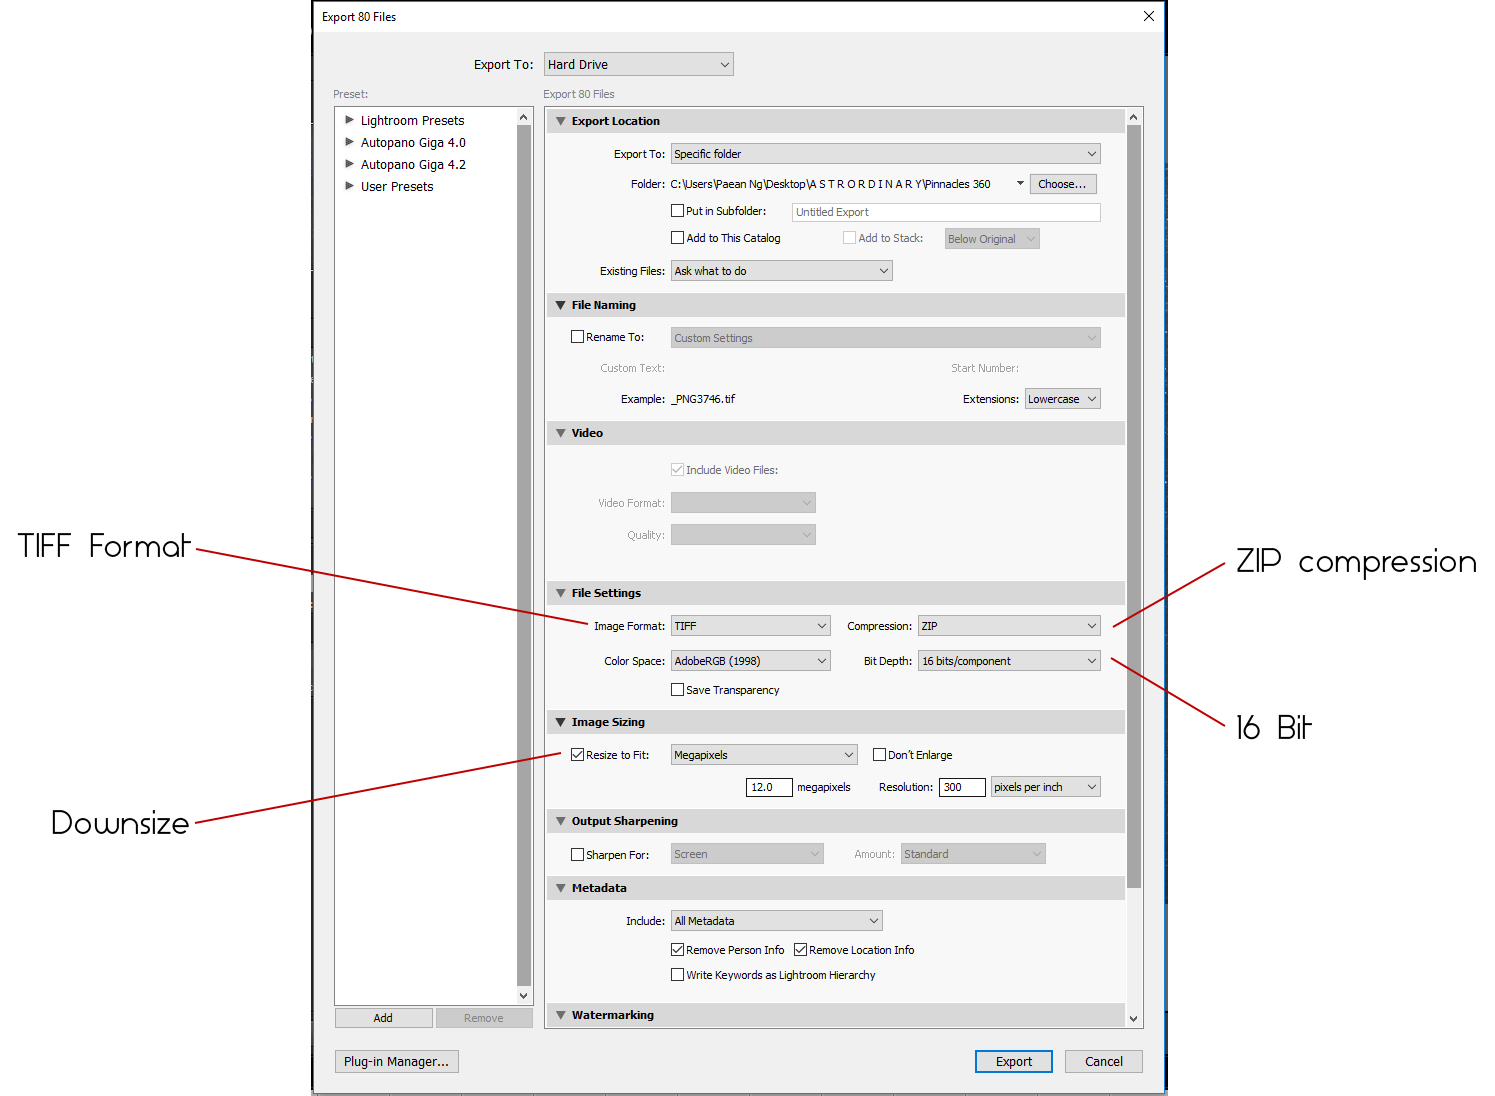
Finally, we can export our images with the following settings: (Note that I downsize my images from 24mp to 12mp to save on storage space)
Stitching and Projection
My preferred stitching software is Autopano Giga. However, Microsoft ICE will do the job as well.
If you need a detailed guide on how to stitch images in Autopano Giga, I've written one here.
Ensure the image is projected as a Spherical projection.

The spherical projection is a 2D representation of a 3D sphere. The distortion towards the top and bottom of the image is a result of this projection, not lens coma or aberrations, and is perfectly normal.
Render the image as a 16bit TIFF file.

Lightroom Processing and Export
Import the stitched image into Lightroom for processing. Ensure the final image is in 2 x 1 aspect ratio or the image will not be projected as a sphere.

Finally! We can export our photosphere. Export the image as a JPEG at 300dpi and ensure that the long side of the image is no wider than 12000 pixels. This is because Google Street View doesn't allow images wider than 12000 pixels.
If you want to upload your image to Facebook, this limitation does not exist.

Upload to Facebook or Google Street View
And we're done! Upload the exported image to Facebook or Google Street View and it will automatically recognize it as a 360 Photosphere!
If you found this article helpful, give us a like on our facebook page and leave us a comment!